Setup and Connection
If you have trouble setting up and connecting to the school network please check the following.
- Your computer meets the minimum hardware requirements (See
Choosing a Device).
- Your computer passes the
Enrolment Checklist. If you are unsure whether or not your computer supports
5Ghz WiFi,
Windows S Mode or if your account has
Local Administrator rights please see the relevant sections listed below.
If you believe your device meets the requirements and you are still having trouble please contact
byox@ipswichshs.eq.edu.au
Accessing School Resources
How can I access G: or H: drive at school?
Install the BYO Mapper App via the Company Portal.
How can I print at school?
IMPORTANT: Currently you can only print the following file types.
Documents: pdf
Images: bmp, dib, gif, jfif, jif, jpe, jpeg, jpg, png, tif, tiff
NOTE: For Office documents (Word, Excel, etc.) you will need to save the document into PDF format prior to printing.
- Whilst on your device at school open your web browser.
- Go to the Papercut server by
Clicking this Link. (Optional: You may wish to bookmark this site)
- Log on using your school account credentials. Once logged on under the Summary section you will see how much balance ($) you have left to print.
- From the left-hand vertical menu select Web Print.
- Click the Submit a Job button.
- Select the printer (B&W or Colour) then press the 2. Print Options and Account Selection button.
- On the next screen enter the number of copies you want then press 3. Upload Documents button.
- Either find the PDF document/s or image/s you wish to print and drag them to the web browser where it says Drag files here or click the Upload from computer button and select your files.
- Press the Upload & Complete button to print your job.
- Once you have finished printing you can log out of the Papercut server.
5Ghz WiFi
Most home WiFi routers and personal hotspots will support both 2.4Ghz and 5Ghz WiFi. At school though we only support 5Ghz so your device must be able to connect to it.
To check if your Windows computer will connect to 5Ghz WiFi:
- Right-click the START button and select Run from the displayed menu.
- Enter
cmd /c netsh wlan show drivers | findstr "Radio types" & pause then press the Enter key.
- In the displayed window if the Radio types supported line shows either of the following then your computer does not support 5Ghz Wi-Fi and won't connect to the school network.
802.11g and 802.11n only
802.11n, 802.11g and 802.11b only
NOTE: If your computer cannot connect to 5Ghz WiFi then a 5Ghz USB WiFi adapter will need to be purchased to enable your computer to connect.
- Press any key to close the displayed window.
Windows S Mode
Windows 10 S Mode is a configuration that Microsoft designed to give you faster boot times, longer battery life, and better security. However, with Windows 10 S mode you can't use certain web browsers or download any apps that are not in the Microsoft Store.
To use your personal computer on the school network the computer must
NOT be in Windows 10 S Mode.
How to Check if You Have Windows 10 S Mode Enabled
To check if you have Windows 10 S Mode enabled:
- Open the Windows Start Menu. You can do this by clicking the button with the Windows logo in the bottom-left corner of your screen or you can hit the button with the Windows logo on your keyboard.
- Then select Settings, this is the button with the gear icon.
- Next, click System.
- Then scroll down the left sidebar and click About.
- Check under Windows specifications to see if you have Windows 10 in S mode enabled. If S Mode is displayed next to your version of Windows then you will need to turn off Windows 10 S mode.
How to Turn Off Windows 10 S Mode
IMPORTANT: Turning off S Mode is one-way process.
To turn off Windows 10 S Mode:
- Open the Windows Start Menu.
- Then select Settings.
- Next, click Update & Security.
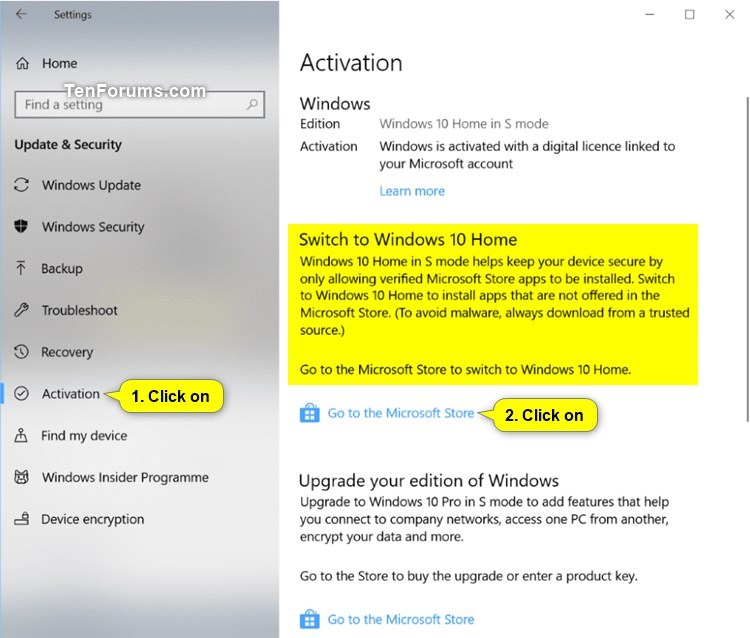
- Then select Activation. You can find this in the left sidebar of the Settings window.
-

Next in the Switch to Windows 10 Home or Switch to Windows 10 Pro section, select Go to the Store. click Go to the Store. You'll see this next to a shopping bag icon with the Windows logo. Clicking on it will open up a new window in the Microsoft Store that says Switch out of S Mode.
IMPORTANT: If you also see an "Upgrade your edition of Windows" section, be careful not to click the "Go to the Store" link that appears there.
- On the Switch out of S mode (or similar) page that appears in the Microsoft Store, select the Get button. This should be a blue button located just below the description.
- Finally, click Install and wait for the process to finish. Once finished, you'll see a pop-up box that says, "You're all set! You have switched out of S mode and can now continue enrolling your computer to be used on the school network.
Local Administrator
For Windows and Apple Mac notebooks the students local account on the device must have Administrator rights.
How to check if your account had Administrator rights (Windows)
- Open the Windows Start Menu. You can do this by clicking the button with the Windows logo in the bottom-left corner of your screen or you can hit the button with the Windows logo on your keyboard.
- Then select Settings, this is the button with the gear icon.
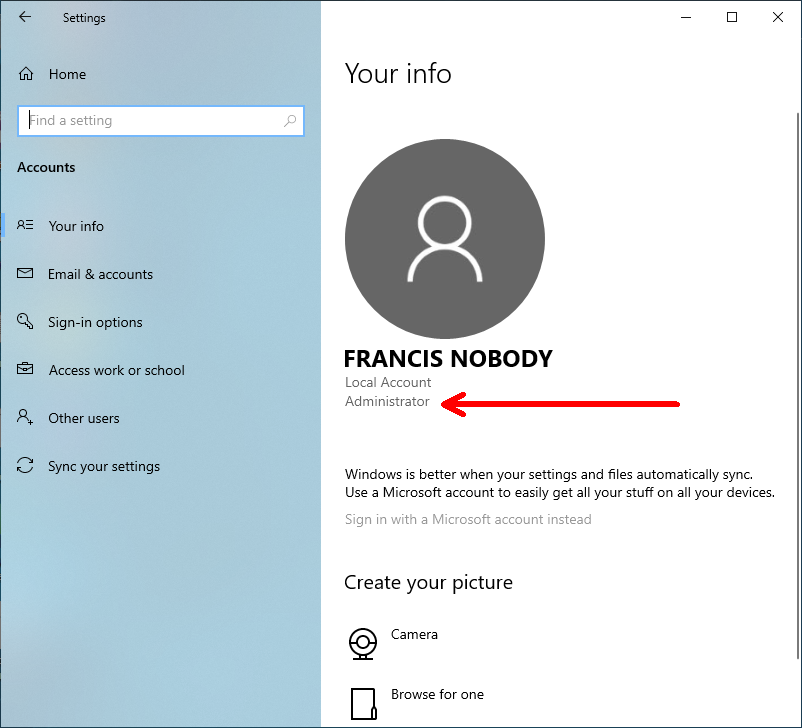
- Next, click Accounts.
- In the 'Your Info' section you will see your account name and below that is should say Administrator.
How to grant Administrator rights (Windows)
- Log onto the computer with an account that has Administrator rights.
- Open the Windows Start Menu. You can do this by clicking the button with the Windows logo in the bottom-left corner of your screen or you can hit the button with the Windows logo on your keyboard.
- Then select Settings, this is the button with the gear icon.
- Next, click Accounts.
- In the left-hand vertical menu select Other users.
- On the right-hand side select the account the student normally uses to access the notebook.
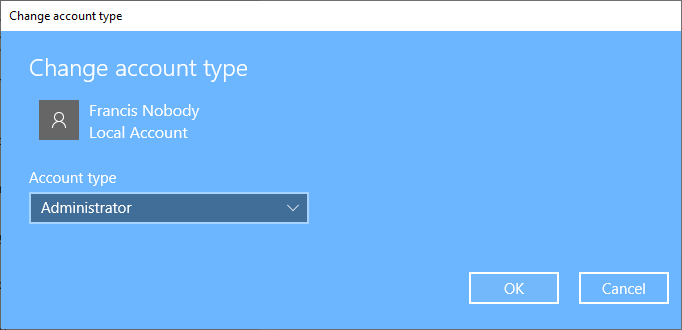
- There should be two buttons displayed, press the one that says 'Change account type'.
- On the next screen click on the Account type field and change it from Standard user to Administrator then press the OK button.
- You can now close the Window and log off the computer.
- When the student logs on with their account use the steps listed above to confirm their account has Administrator rights.